MySQL installation tutorial (ZIP version)

I am learning crawlers recently, which requires the use of MySQL database. I went to the official website today and I was shocked. The version number is 8.0.17? ? ? ! In my impression, MySQL has always been version 5.0+, and it seems to have jumped directly to 8.0, so I asked someone to copy a copy of mysql-5.7.26-winx64.zip.

The official version provides a mis installation version, but I actually find it more difficult to install the package version. . .

You can also find resources online or go to the official website Download:https://dev.mysql.com/downloads/mysql/5.7.html#downloads

Unzip

Unzip the zip to local, such as: D:\Program\mysql-5.7.26-winx64

Configure my.ini

Open the previously decompressed directory, create a new notepad file, enter the following content, and change the file name to my.ini

[mysql]
#Set the default character set of mysql client
default-character-set=utf8
[mysqld]
#Set port 3306
port=3306
#Set the installation directory of mysql
 
basedir=D:\Program\mysql-5.7.26-winx64
#Set the storage directory for the data of the mysql database
datadir=D:\Program\mysql-5.7.26-winx64\\data
 
#Maximum number of connections allowed
max_connections=200
#The character set used by the server defaults to UTF8
character-set-server=utf8
# The default storage engine that will be used when creating new tables
default-storage-engine=INNODB

skip-grant-tables

Environment variables

Copy the bin directory address and add it to the environment variable

Reference: https://lengqie.live/archives/103.html

Installation and Initialization

Run CMD input with administrator rights (must be an administrator here!!!)

mysqld install #Install
mysqld --initialize #Initialization

Start service

net start mysql #Start service

Login

mysql -uroot -p #Login

Since the last item when configuring my.ini is configured for password-free login, a password is required for login. If you want to log in with a password, please

Reconfigure my.ini and comment the last line of code, such as

[mysql]
#Set the default character set of mysql client
default-character-set=utf8
[mysqld]
#Set port 3306
port=3306
#Set the installation directory of mysql
 
basedir=D:\Program\mysql-5.7.26-winx64
#Set the storage directory for the data of the mysql database
datadir=D:\Program\mysql-5.7.26-winx64\\data
 
#Maximum number of connections allowed
max_connections=200
#The character set used by the server defaults to UTF8
character-set-server=utf8
# The default storage engine that will be used when creating new tables
default-storage-engine=INNODB

#skip-grant-tables

During initialization, the system randomly generates passwords. You can use the .err file in the data directory of the installation directory! We can open the file to view the default password, which is around line 7.

We can change the password using a simple MySQL statement after logging in to MySQL

set password for root@localhost = password(‘your password’);

Remember to restart the service after changing the configuration file

net stop mysql #pause service
net start mysql #Start service
Python various derivation expressions

List comprehension

List comprehensions can use data types such as range intervals, tuples, lists, dictionaries, and sets to quickly generate a list that meets specified requirements.
The syntax format of list comprehension is as follows:

[Expression for iteration variable in iterable object [if conditional expression] ]

example,

>>> list=[x**2 for x in range(10) if x%2==0]
>>> list
[0, 4, 16, 36, 64]

Multi-level derivation;

>>> list=[(x,y) for x in range(5) for y in range(5) if x%2==0 if y%2!=0]
>>> list
[(0, 1), (0, 3), (2, 1), (2, 3), (4, 1), (4, 3)]

Dictionary derivation

Dictionary comprehensions are similar to list comprehensions. example,

>>> dict={"a":3,"b":5}
>>> dict2={k:v**2 for k,v in dict.items()}
>>> dict2
{"a": 9, "b": 25}
>>> dict={"a":3,"b":5}
>>> dict2={v:k for k,v in dict.items()}
>>> dict2
{3: "a", 5: "b"}

Set derivation

Set comprehensions are similar to dictionary comprehensions. example,

>>> set={x**2 for x in {1,2,3}}
>>> set
{1, 4, 9}

refer to

Sunflowers in the Rising Sun

Time module: time
Time is a built-in module of python, which passes a series of operation time functions. Reference method:

import time; #Introduce time module

Time acquisition

  • timestamp
    Each timestamp is expressed as how much time has passed since 00:00 on January 1, 1970

    nowtime=time.time()
  • Visualize time
    Since the timestamp is not suitable for our observation, we can use ctime to visualize the time of the timestamp transfer behavior.

    nowtime=time.ctime()
  • time tuple
    Time tuple (struct_time) is a time format that python can handle

    nowtime=time.gmtime

    Due to the division of different time zones, we will find that the time we obtain will be eight hours different from the actual time. We can obtain the local time through localtime, and the obtained time is also a time tuple structure.

    localtime=time.localtime()

    Time formatting

    >>>localtime=time.localtime()
    >>>time.strftime("%Y-%m-%d %H:%M:%S"),localtime

    Structured representation

    FormatMeaning
    %alocale simplified day of the week name
    %ALocal full week name
    %bLocal simplified month name
    %BLocal full month name
    %cLocal corresponding date and time representation
    %dDay of the month (01 - 31)
    %HHour of the day (24-hour clock, 00 - 23)
    %IHour number (12-hour clock, 01 - 12)
    %jDay of the year (001 - 366)
    %mMonth (01 - 12)
    %MMinutes (00 - 59)
    %pThe corresponding character of local am or pm
    %SSeconds (01 - 61)
    %UThe number of weeks in the year. (Sunday 00 - 53 is the start of the week.) All days before the first Sunday are placed in week 0.
    %wDay of the week (0 - 6, 0 is Sunday)
    %Wis basically the same as %U, except that %W starts the week on Monday.
    %xLocal corresponding date
    %XLocal response time
    %yYear without century (00 - 99)
    %YComplete year
    %ZThe name of the time zone (null character if not present)
    %%‘%’ character

    Program timing

  • perf_counter()
    perf_counter() is a timing function that can return a CPU-level accurate count value in seconds. When used, two timings are required to calculate the difference to obtain the correct program running time.

    >>>start=time.ptrf_counter()
    >>>end=time.ptrf_counter()
    >>>time=end-start

    -sleep()
    sleep(s) is a sleep function. Its usage is similar to C/C++. s is the sleep time, the unit is seconds, and it can be a floating point number.

    >>>def wait():
    time.sleep(3.3)
    >>>wait()

How to draw an ellipse in Pandas Pie?
Pandas provides the method DataFrame.plot.pie() or Series.plot.pie() for drawing pie charts.
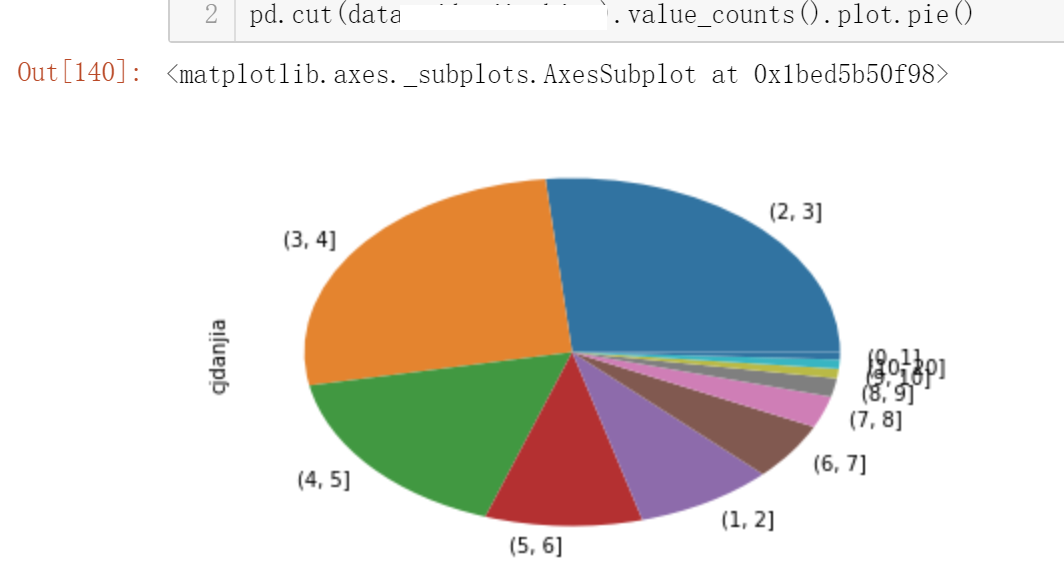
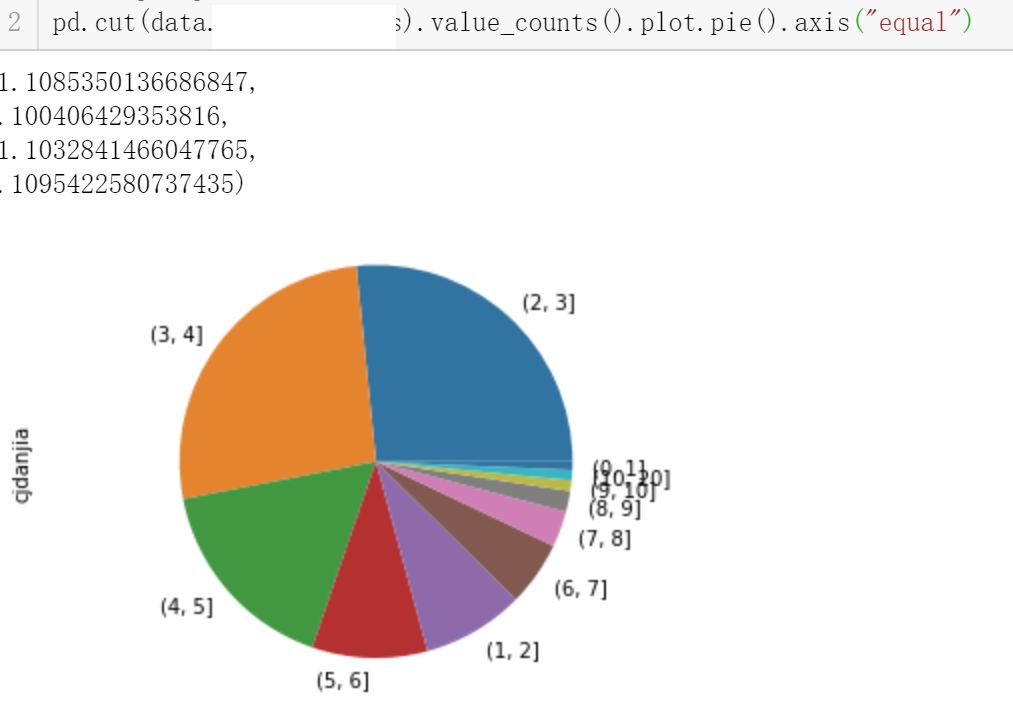
But I discovered something interesting: in some versions of Pandas, the pie chart displays an elliptical chart, while my current version of the pie chart displays a perfect circle chart.
rGDVXt.png
I opened the Internet and found that in some versions Pie does draw ellipses, and you can draw a perfect circle through plot.pie().axis("equal").
rGg33F.png

How to draw an ellipse or customize an ellipse?

In Pandas source code you can find that its drawing is implemented through matplotlib of.

def pie(self, **kwds):
"""
Pie chart
.. versionadded:: 0.17.0
Parameters
----------
**kwds : optional
Keyword arguments to pass on to :py:meth:`pandas.Series.plot`.
Returns
-------
axes : matplotlib.AxesSubplot or np.array of them
"""
return self(kind="pie", **kwds)

So how does matplotlib draw a pie chart?

From the official documentation:
matplotlib.pyplot.pie:https://matplotlib.org/api/_as_gen/matplotlib.pyplot.pie.html?highlight=pie#matplotlib.pyplot.pie
which mentioned

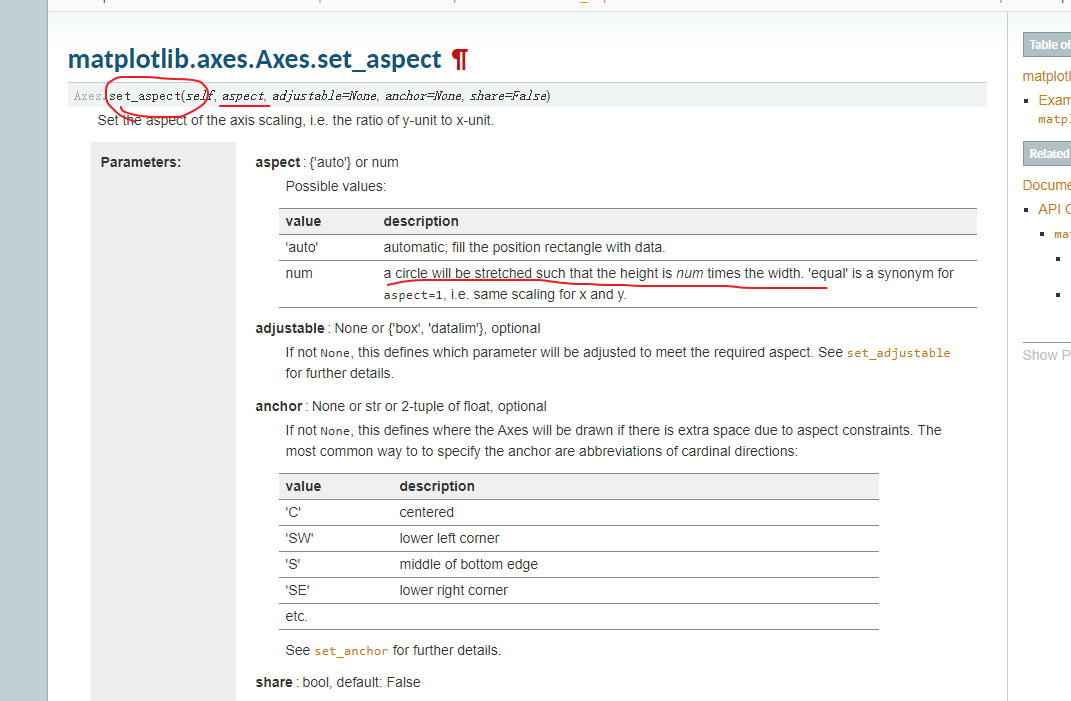
The axes aspect ratio can be controlled with Axes.set_aspect.
So find the setting method in matplotlib.axes.Axes.set_aspect:
rG2dqs.png
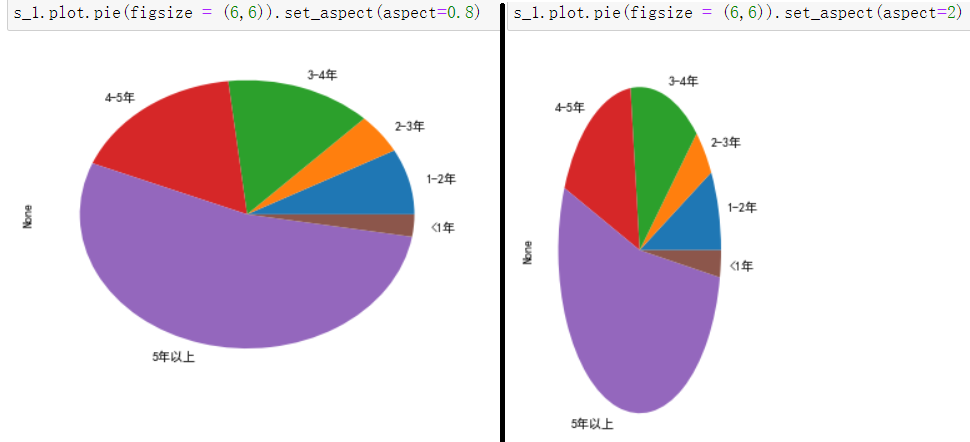
You can customize the ellipse by modifying the aspect ratio of the circle n times in pie().set_aspect(aspect=n).
Finally I can draw ovals happily!